Showing posts with label how to. Show all posts

9.07.2013

DIY Embellished Collar

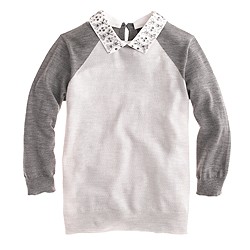
Anyone else obsessed with the embellished collars right now? They are going to be amazing under those fall sweaters.
Merino Tippi baseball sweater with removable collar

In skimming through my In-Style special beauty issue I came 
across a genius DIY for one. It's even NO SEW.

I know it's not really legible, so here's the jist. 
All you need are: beads-3 colors. One smaller than the other two. Two sizes of safety pins, and a shirt you want to embellish. 
Thread the beads onto the safety pin and arrange in a design you'd like. I'm already imagining the possibilities. Also, using safety pins allows you the ability to take them off and make a new design on the same shirt. Loving this! 


*jcrew.com, dressmeblog.blogspot.me, instyle beauty issue*

6.24.2012

The Whitney Wave

I ran across this the other day and can't get over it. The idea is brilliant really. I can't wait to try this! Think of the control you get! This would be a really great prep for beachy waves with a salt spray. Once you've flat ironed spray in the sea salt and it'll give you that amazing beach texture. Bumble and Bumble and Big Sexy have great ones.

11.06.2011

DIY Floating Vases

Remember these babies? Well, I always knew I wanted to try them somehow. I decided Crew's blessing would be perfect. I think they turned out better than expected. I'm sure there are plenty of ways to do this, but I decided this is what I was doing with only 1 day to put it all together. With the help of my fabulous mother, I pulled it off.  A few people were nervous they might fall, but they lasted days up there no prob! They would have lasted as long as I needed. Here's my quick and easy way of achieving this.

What You'll Need:
Clear ornaments (various or same sizes- glass or plastic- keep in mind glass is heavier)
    Michael's and Big Lots always seem to have a good deal on them.
Fishing line
Push pins (clear or same color as ceiling)
Glue gun (my best friend for this)
Flowers

1. Take the top off the ornament. Measure how long you'd like them to be and cut some line to that length. Wrap around the top of the ornament with a knot and generously glue it on.

2. Take the top of the line and make a knot. Make another knot, making sure not to pull it tight. Slip the push pin in the middle of the knot. So, the knot is wrapped around the pin. You can do this a couple times to make sure it doesn't come off. 

3. Put in ceiling. Repeat step1-3 until you have them all hung the way you'd like. To get them to be exactly the same length (fishing line is hard to work with), I would wrap the line around the tip of the ornament and glue until it was level. I really used quite a bit of glue.

4. Once they are all up the way you'd like, fill them with water. This was a little tricky- a funnel would be the smartest. It was 3am when I was doing this. I only put enough in for the flowers to reach. I was a little nervous they would fall, so I was cautious. They can get heavy. 

5. Lastly, I added the flowers. Voila. I have to say I really loved them. When I took them down I wrapped the string around my finger and put masking tape around them. I then stuck it in the bulb to keep from tangling. I plan on using these again for sure!

7.24.2011

My DIY Alphabet Pillow

So to catch up real quick- never made it to Nordstrom sale. :( Dr. put me on bed rest the day before! Hopefully you all found awesome things though! There's always next year! ;) Baby is coming any day now- about 3 weeks early. We've been on super speed making sure everything is ready. Still stuck on a picture collage for the nursery, so it's not quite 100% yet. Anyways, once I saw this pillowalphabet pillow I knew I had to have one for the nusery. However, I wasn't in love with the harshness of the black lettering in my nursery. I also wasn't sure how to go about it? Iron ons? Didn't know until we were in Restoration Hardware and my mom came up with the brilliant idea to stamp it! YES! I had found this pretty light blue material at IKEA that I knew would fit perfectly in my nursery. I decided I would try to make a pillow since two sides were already hemmed and finished. I purchased one of their pillow inserts as well. I am SO happy with it! I can't even believe how perfect it turned out! I wasn't sure if it was going to so I took the picts once I had completed it, so hopefully it makes sense.

You'll Need:
Scissors
Fabric Paint with pointy tip
Fabric- measure for insert (I got about 1 1/4 yard)
Pillow Form
Iron Fusion tape- What's this called? ha ha Ikea has it next to their fabric. I knew it would be easier than sewing for me
Alphabet Stamps
Iron
Measuring tape
Ruler/something to keep a straight line
Wet paper towel
Paper to place in between fabric to prevent bleeding

It really probably would have taken about 1 hour had I not debated and knew what I was doing.
Cost: around $15

1. Iron fabric to make smooth. I then placed my pillow form on my fabric measuring where it would end in the back. To make the first side crease I placed some iron tape straight along where I wanted my "seam to be" and ironed. I then did the same for the other side making sure it wasn't too lose. I then "hemmed" the closing seam and closed it- again measuring with the pillow. Finally, close one end of the pillow. I closed the bottom and finished with the top, but I would do it the other way around.

So now you have it "sewn" on 3 sides and closed. 1 opening left to put the pillow in.

2. Insert paper in between your fabric as a buffer so the paint doesn't soak through to the other side. Take your measuring tape and find the mid point of your fabric. Then place paper or a ruler from the point going across your fabric to help keep the stamps straight. I taped mine down so it wouldn't move.
*picts with camera phone- sorry*
3. I was lucky that my stamps were already in big rows. I kept them as connected as possible so that they would be as evenly spaced as possible. I found mine at Target in the $1 spot! Align your stamps in a row. This helps with spacing and measurements. Keep them there taking a row at a time to stamp. Make sure to measure from the edges as well to get it centered. Mine was about 9"n down and then 4" in on both sides.

4. Take your paint and paint it directly on letters. Try not to let it bleed over the edges- some show when you stamp it. Also make sure to do some practice runs on spare fabric. I did several before really going for it.
5. Stamp letters. I pressed really hard, but being careful not to smear or rock it too much. I wanted the letters crisp. Wipe the letters with a wet paper towel after stamping since the paint will dry on them.

6. Once you're stamped, make sure it's 100% dry. Remove the paper and everything you have taped down. Then insert your pillow form.

7. Now, it's time to close it. This was the hardest part. Realistically I should have waited for more hands. I needed someone to hold while I ironed it closed, or vice versa. I ended up standing the pillow up and taking my flat iron to it to hold it until I could get to where I could iron without it moving. *only do this if your flat iron is completely clean and it's little* I then could push the pillow down a little and really iron it together without it moving on me.

 That's it! You're done!! I am so in love with this pillow! It looks perfect in my nursery!! I hope it inspires other great things to come!

Again I would finish with the bottom not the top- it would probably lay nicer. :) Hope this all makes sense. Let me know if you have any questions.
5.22.2011

Easy Up-Do

During our Kevin Murphy education class, Alberto our teacher, showed us a fabulous way to throw your hair into a great up-do in minutes. I am loving this do. It looks great with all types of hair.  Perfect for a hot summer's day. He also introduced us to these awesome hair pins. You can get them here on amazon, or Sally's carries them- however I only found 1 brown box between nsl and draper- so- you may want to order them. They are amazing though!! I wasn't sure the best way to show you this- so sorry it's very amateur ha ha. I think you'll get the gist though. :)
What you'll need:
Awesome hair pins and hairspray. That's it!
Good Hair Days Magic-Grip Hairpins

4.25.2011

Spring Framed Vases

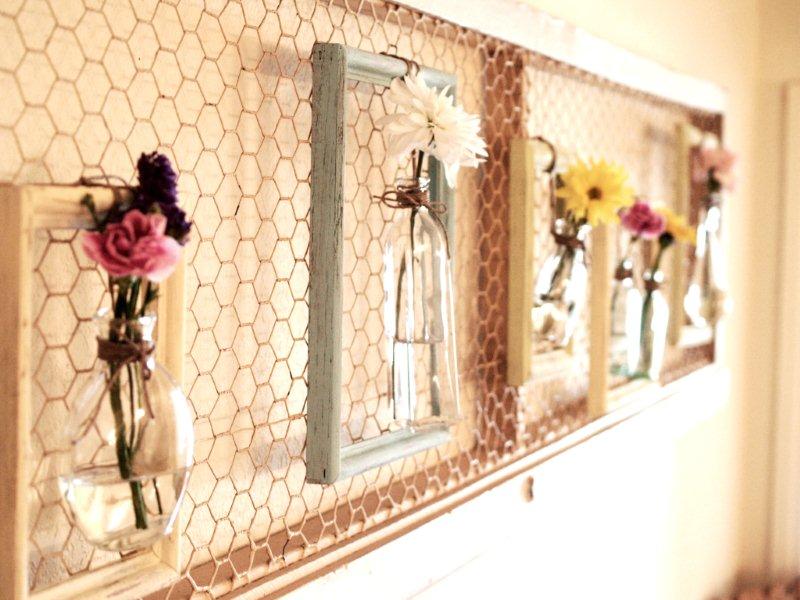
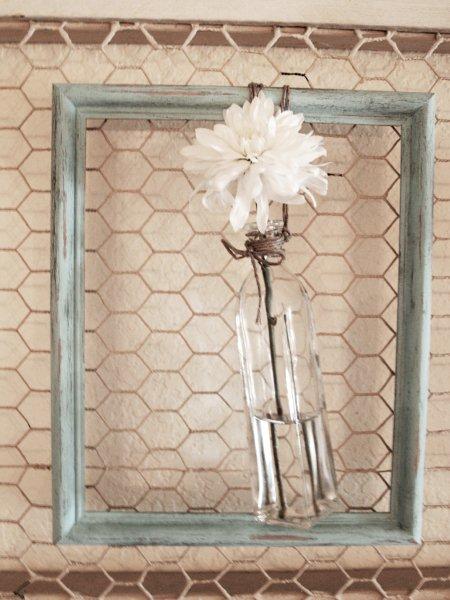
Remember those hanging vases I love so much? Look how cute this is! Fresh flowers on your wall. I bet it smells wonderful also. Not only am I loving the vases, I love the frame tutorial. I really love frames and have found it's so simple to paint them how you'd like. I think these turned out great. Now to the DI to find some frames! :) It's a nursery project I'm just beginning. I'll let you know! ;)


See more pictures and get the full How-To HERE

4.21.2011

Beach Waves

I think we are way over-due for a hair post! I wanted to share a great video I found on Hairdresser On Fire. She always has great hair tips. This video is a tutorial for beachy waves. For me there is something about the heat and summer that makes me want to break out my natural texture. I have crazy texture, which I won't get into, but this is perfect for curly or straight hair- with the right products.

Hair Dresser On Fire HDOFBlog.com Tutorial on styling beachy waves blow dry, by Reagan Breinholt from Jacob Breinholt on Vimeo.

Now- if I were to do this with my hair, it would take longer than my normal routine of just round brushing it out. That frustrates me. When I'm going for something that's supposed to be simple and look effortless, I don't want it to take twice as long. This is how I would alter it.

PRODUCTS:
1. Mousse: I actually really like Volumax from Sally's, but most mousses work. You just don't want it to be too sticky.
Volumax Volumizing Mousse 9 oz (226 ml)

2. Leave-In conditioner: My fav right now is nicknamed "hair crack". Briefly why I love it: it has protein (to help strengthen hair), moisture, UV protectant, and the big one HEAT protectant. I really am addicted to it. It can get a little heavy so start with the tiniest bit and work from ends up.
RD Plus Leave-in Protein Cream with DaoPlex 5.01-oz.
*side note- you could also substitute a curl cream, just make sure it has heat protectant. My hair already has so much curl, I just like what this offers.

3. Salt Spray. This add a salt water like texture to the hair. Again start with a little- you can always add. This is the one she uses in the video- or Surf Spray by Bumble and Bumble would be great also.
Sachajuan Ocean MistBumble and Bumble Surf Spray, 4-Ounce Bottle

STYLING:
1. After applying products blow dry the wet out- about 50%- making sure the roots are mainly dry. You could tip your head upside down if you want a lot of volume, just watch out for frizz.

2. Form curls the same as she does, only I would do half of my head at once.

3. Once I have a few formed I take a pronged diffuser and while keeping curls formed set them in the diffuser to dry. Do this a few times around the head. Get them 90% dry, so that if you need to reform you can. Also, do more Salt Spray if needed.
Babyliss PRO Diffuser BABDF06
4. Once formed and sprayed diffuse again until completely dry. Let cool for 5-10 min, then separate.

Yay! Now if only it would stop raining and warm up!!

4.19.2011

Confetti Eggs

This looks like a good time! What a fun game! I want to have a party like this.


Rules of The Game:

  1. Hide your eggs as usual and let friends hunt for them
  2. When everyone has finished, the smashing begins
  3. Nicely (no throwing) smash the eggs on friends' heads
  4. The one who gets the golden confetti smashed on their head wins the grand prize.


How To Make The Eggs:

  1. Use a sewing pin and poke a hole at the top of the egg
  2. Open a larger hole at the bottom of the egg
  3. Let the egg drain out of the bigger hole into a bowl- blowing through the top small hole if necessary.
  4. Rinse and let dry.
  5. Color the eggshells- let dry thoroughly
  6. Fill each egg about halfway with confetti (fruity pebbles, or your choice of filling). You can use a funnel if you need to
  7. Cut a piece of tissue paper slightly larger than the egg's hole. Glue the paper to the edges of the hole.
  8. Let the smashing begin!


*tutorial and picts from Oh Happy Day*

4.17.2011

Rainbow Slush

This is making my mouth water! I am someone who single-handedly keeps a sno-shack in business. Flavored ice is really one of my very favorite treats, in any form (weird, right?!). This would be so adorable to have for a BBQ! 

This is how you make it:
You Need:
Frozen pops, trifle bowl, scissors, fork, and small bowl

Separate by color 
Cut open tubes and empty into bowl

Take your fork and smash them up so there aren't any big chunks. Try and get it super soft so it spreads evenly

Empty into the trifle bowl

Use fork to smooth down evenly. 
Repeat with each color remembering to place trifle bowl in freezer between colors so they don't mix
Take out of freezer long enough to soften a little before serving

More pictures and tutorial found *here*.

4.10.2011

Letter Lamp


LOVING this lamp (even just plain letter) idea for baby. I think it's so great when you can customize things to how you want- font, size, color. Perfect. Here is the how to from Design Sponge!

4.03.2011

Newspaper Nails

Besides glitter, I rarely like much on my nails. I think looks so cool though! This site is in French- so this is what I get from it-

  • Paint a base coat- let dry completely
  • Apply two coats polish- let dry completely
  • Cut newspaper squares large enough to cover your nail
  • Soak your nails in alcohol
  • Press newspaper squares across nail- remove slowly
  • Let dry completely
  • Finish with top coat.


*http://www.passionnailart.com/tutoriels/print/print.php*

Really interested in trying this with my toenails.

3.24.2011

No-Sew Banner

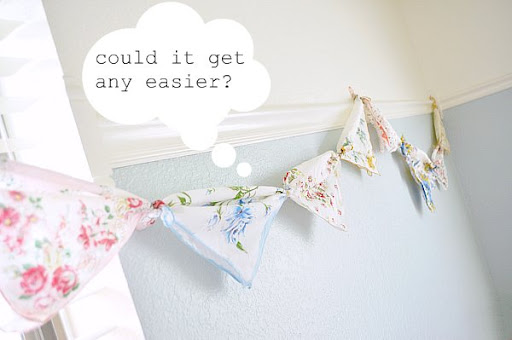
I am contemplating putting one of these in baby's room. I feel these banners (while I do love them) are super trendy right now, and I want the nursery to have more of a classic/elegant feel, so the jury's still out. However, this is the most amazing way to make it happen. I would want it to be made from fabric, and I thought "Really, I'm going to sit and sew a triangle banner together?" Not that it would be hard, but maybe time consuming. I love this! Take square fabric, fold in half, tie together, hang. Perfect!! Love that she used handkerchiefs! The possibilities are endless with this!!
THANK YOU MOTHER HUDDLE!
No Sew Vintage Handkerchief Bunting
Tied Vintage Hankie Bunting

Crayon Shapes

I've seen a couple ways to do this. I think this is the easiest and cutest way! I found it here on makeit-loveit.com. I think it would be a great activity for the little ones.
How To:
  1. Grab some old (or new) crayons and peel off the wrappers
  2. Get a variety of colors together- peeled and broken
  3. Use any kind of oven safe mold. She found hers and Ikea for super cheap. Crayons also ended up sticking, so I would make sure they're ones you don't want for anything else
  4. Fill the molds with variety of colors, breaking them to fit if necessary.
  5. Place molds into a pre-heated 250 degree oven for 5-10min. Check on them every so often. Also, place tin foil on the rack below the crayons in case of any spills. 
  6. Poke the crayons when you think they are almost all the way melted to release air pockets-don't stir.
  7. Once the crayons are completely melted, let rest on counter until completely melted.
  8. Place molds in freezer about 15 min to really harden
  9. Run the bottoms of each mold under hot water, to help soften the silicone and help separate the crayons from the mold. Push the molds from the bottom of the tray to pop out each crayon.
  10. You're done! :) Color away!

3.21.2011

Threaded Balloons

These are pretty awesome! Why is it that the elementary school crafts can look so amazing? Remember making paper mache' easter eggs? I love these! It's all in a different language, so this is what I got from it.

  • Mix half water half glue.  
  • Place the strings/yarn into the glue then onto the balloon. 
  • Let dry hanging. 
  • Pop the balloon and remove. 
Sweet!

Here are some other amazing things you can do with this. Maybe a nursery addition?? COOL!!